⚠ Caution: You may harm yourself, get burns, electric shocks, if you don't know how to do soldering or by your carelessness.
Note: File download won't work if page translated. So, download file without translating this page.
We're not going to say that this DIY Project will be easy to do as our previous DIY Project: "Class D Audio Amplifier Using - PAM8403 - 3W" but we're pretty sure that doing this DIY Project would be fun for you. If you're thinking that this DIY Project is quit tough for you as you're new to DIY Projects, Then, this post is for you because this post is written after considering about DIY Hobbyist, who are new to DIY Projects. So, don't worry about any obstacles which you may face during this DIY Project.
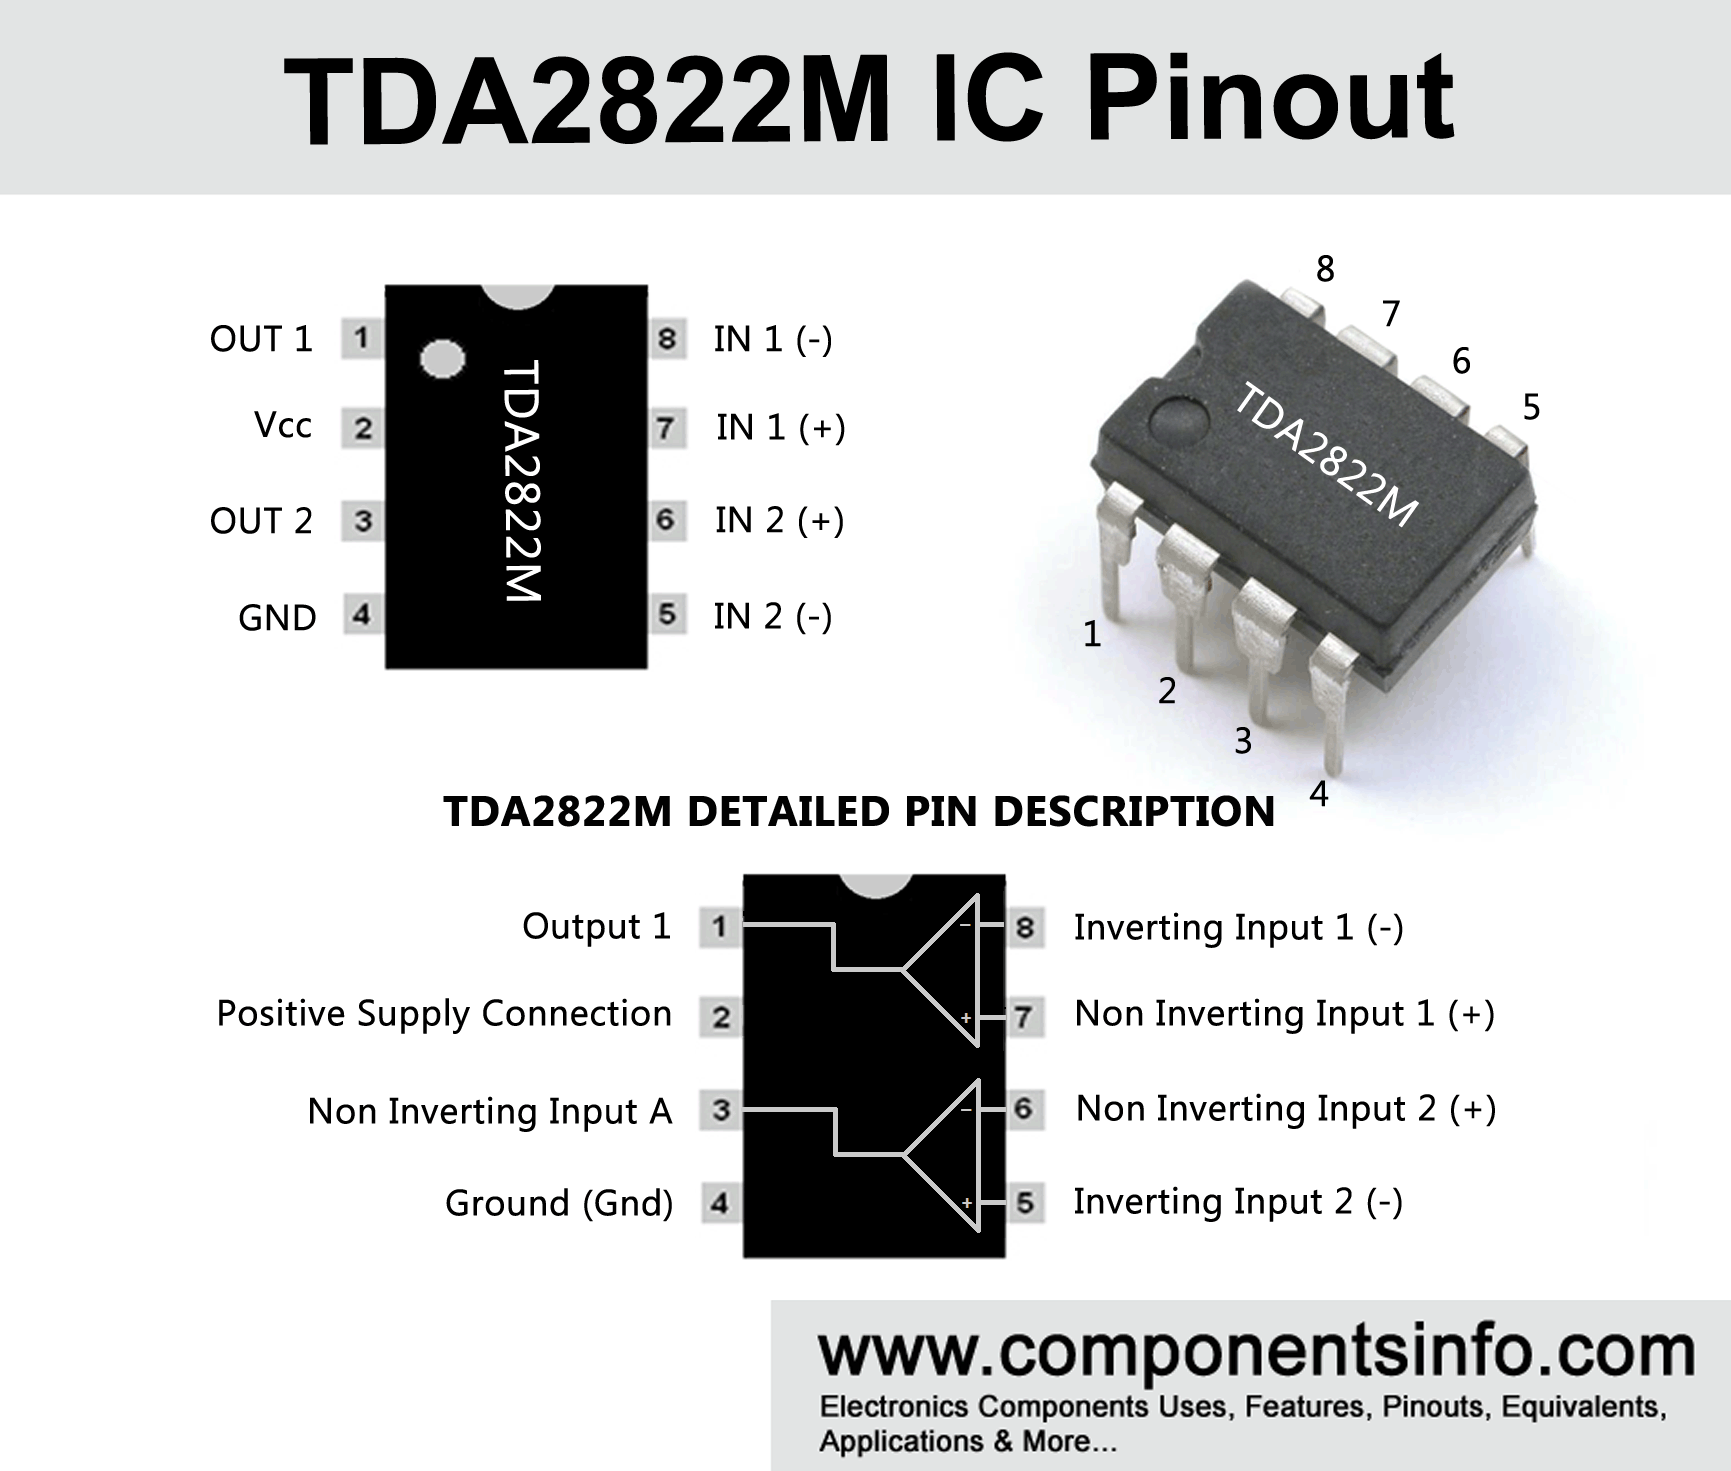
| 1. IC | TDA2822 / TDA2822M | ₹10 - ₹15 |
| 2. Ceramic capacitor | 100 nf (104) | ₹ 2 |
| 3. Electrolytic capacitor | 1 µf | ₹3 - ₹5 |
| 4. Resistor | 1 K | ₹ 1 |
| Total: | ₹16 - ₹23 (apx.) |
We assume that you already have speaker - 4" 4 Ω (use radio speaker or any Hi-Fi speaker for best performance.), wire for soldering, power supply ( battery or phone charger), earphone or headphone wire with 3.5 mm audio jack, for soldering you also need soldering iron, soldering wire, soldering paste (flux) and wire cutter and you know how to do soldering. You can also say that these are the prerequesties. Before going ahead we recommend you to read these datasheets of TDA2822 or TDA2822M. Then consider about amp configuration, which suits on your need; mono or stereo. Keep in mind that mono will give more output power while stereo will give surround effect just like on earphone or hedphone. Now we're ready to go. Just solder up the connections as in circuit diagram and your audio amp will be ready to use.


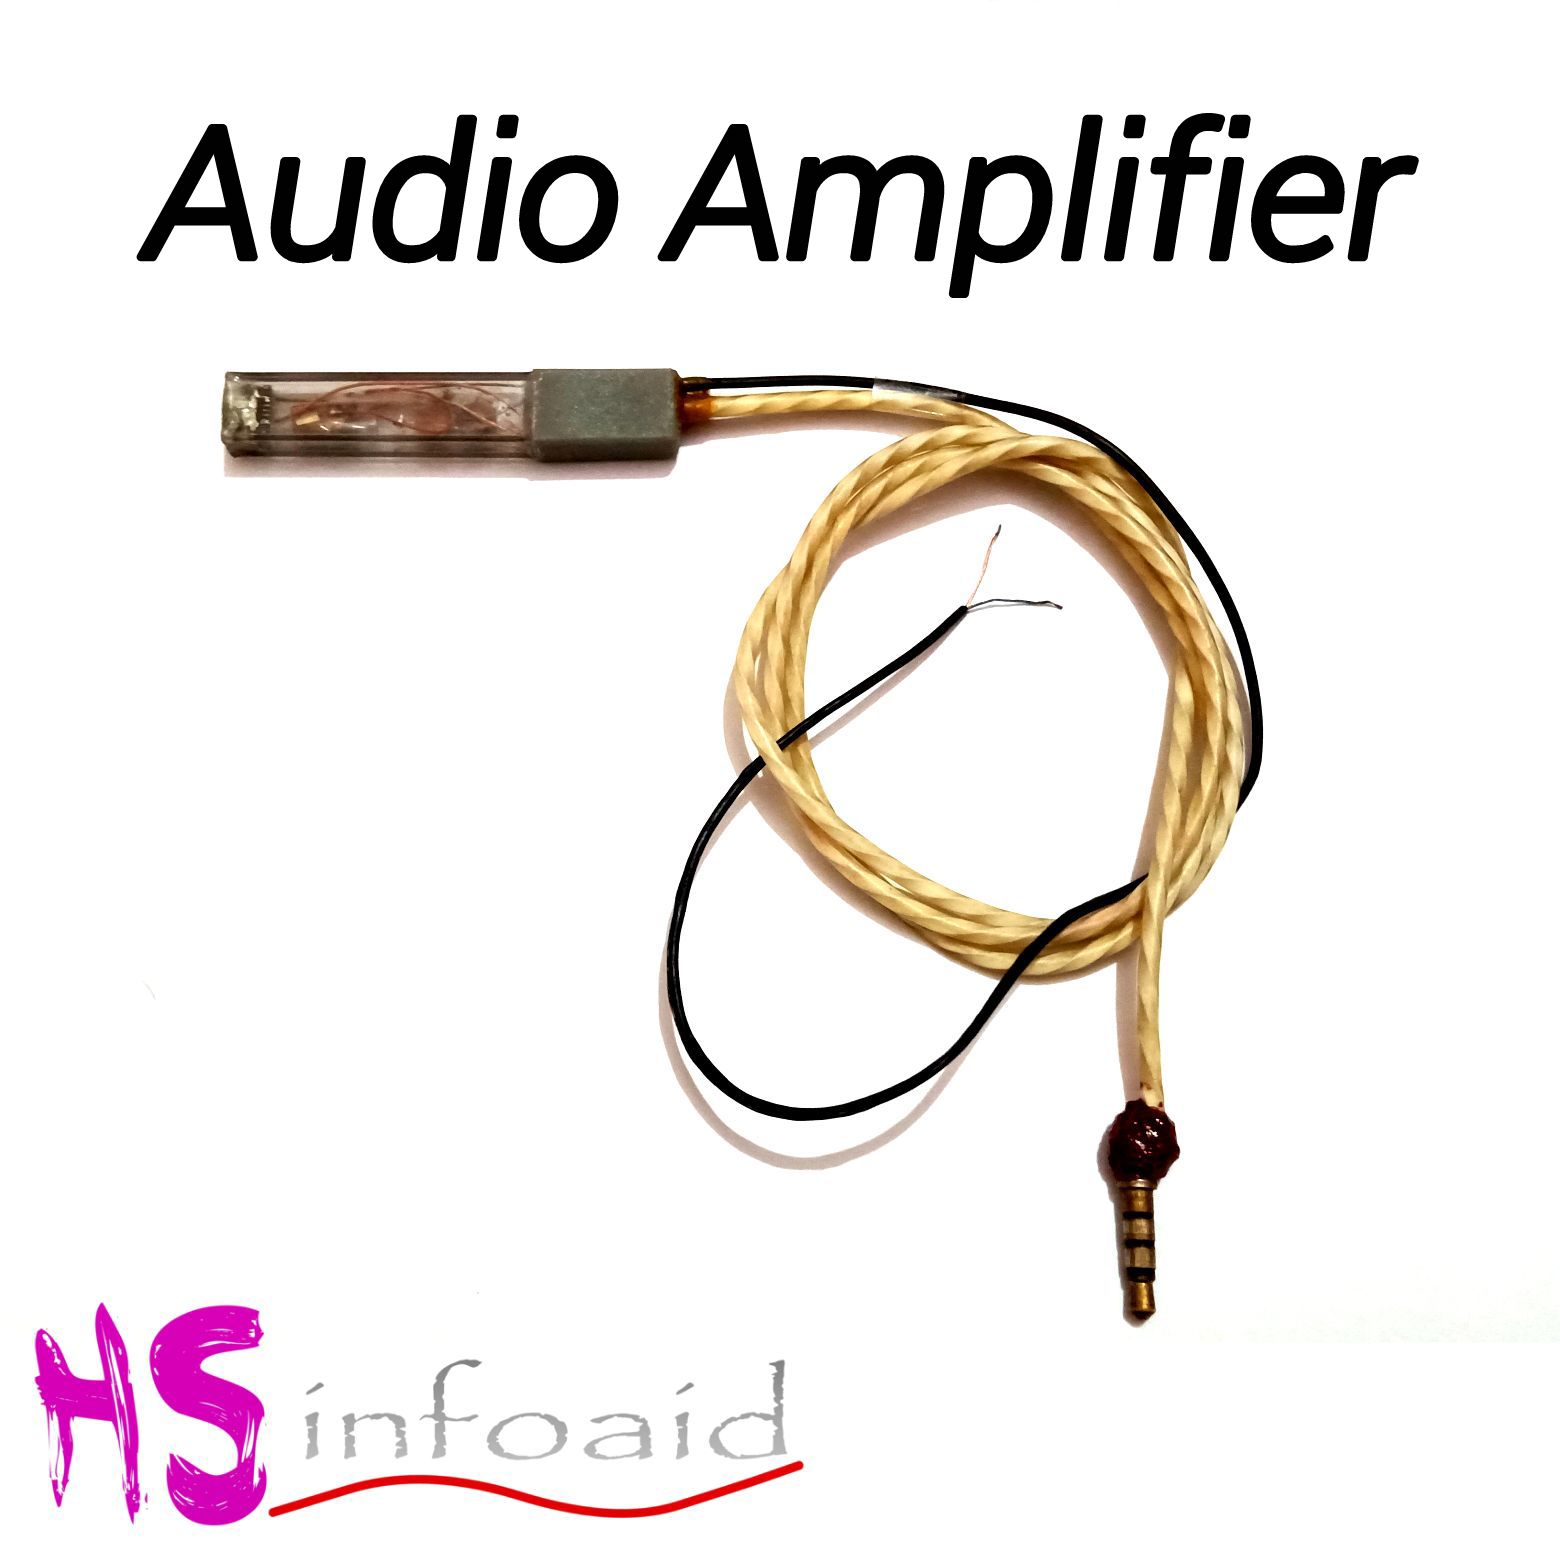
At our workplace, we found a lead box which we used to refill our mechanical pencil. Suddenly, an idea came up in our mind that it could be use for making amp's body/cover. Then after thinking a lot and doing some modification in lead box and circuit, we end up with this slim amp ever made with TDA2822 audio IC in DIY Projects. It dimension as, 5.8 cm X 1 cm X 0.5 cm, which is quite impressive. Impressed by its compact size we wish to make it more compact in size in future. It can powered by any microUSB charger.
Check out our videos at YouTube > @hsinfoaid.

DIY Projects
Comment your feedback, suggestion and request below.